The crackle of caramelized sugar on top of a silky smooth cheesecake – honestly, there’s just something magical about creamy mini crème brûlée cheesecakes. The first time I made these little wonders, I was craving something fancy but fuss-free, and this recipe delivered every bit of that indulgence. You know that warm, burnt sugar aroma that fills the kitchen? It takes me right back to cozy nights curled up with a good book and a sweet treat in hand.
I’ve whipped up this creamy mini crème brûlée cheesecakes recipe countless times, tweaking it for the perfect balance between rich, velvety filling and that satisfyingly crisp brûlée topping. What I love most is how these tiny desserts feel so special – like a personal celebration in every bite. Plus, they’re easy enough for a weekend project but impressive enough to serve guests.
If you’re into desserts that combine creamy textures with a hint of caramelized crunch, this is your new go-to. These cheesecakes aren’t just delicious; they’re a little homemade delight that brings a touch of elegance to your table without a ton of hassle. Perfect for date nights, dinner parties, or simply treating yourself after a long day. So, ready to make creamy mini crème brûlée cheesecakes your next sweet obsession? Let me show you how.
Why You’ll Love This Recipe
- Quick & Easy: From start to finish, these mini crème brûlée cheesecakes come together in under an hour, making them perfect for those last-minute dessert cravings.
- Simple Ingredients: You likely have most of what you need in your pantry – cream cheese, eggs, sugar, and a few basics—no fancy trips required.
- Perfect for Any Occasion: Whether it’s a cozy family dinner, a holiday gathering, or a chic brunch, these petite cheesecakes always shine.
- Crowd-Pleaser: Kids, adults, picky eaters – these creamy mini desserts get rave reviews across the board.
- Unbelievably Delicious: The combination of a luscious cheesecake base with a crisp, caramelized sugar top is just heavenly – every bite is a little moment of joy.
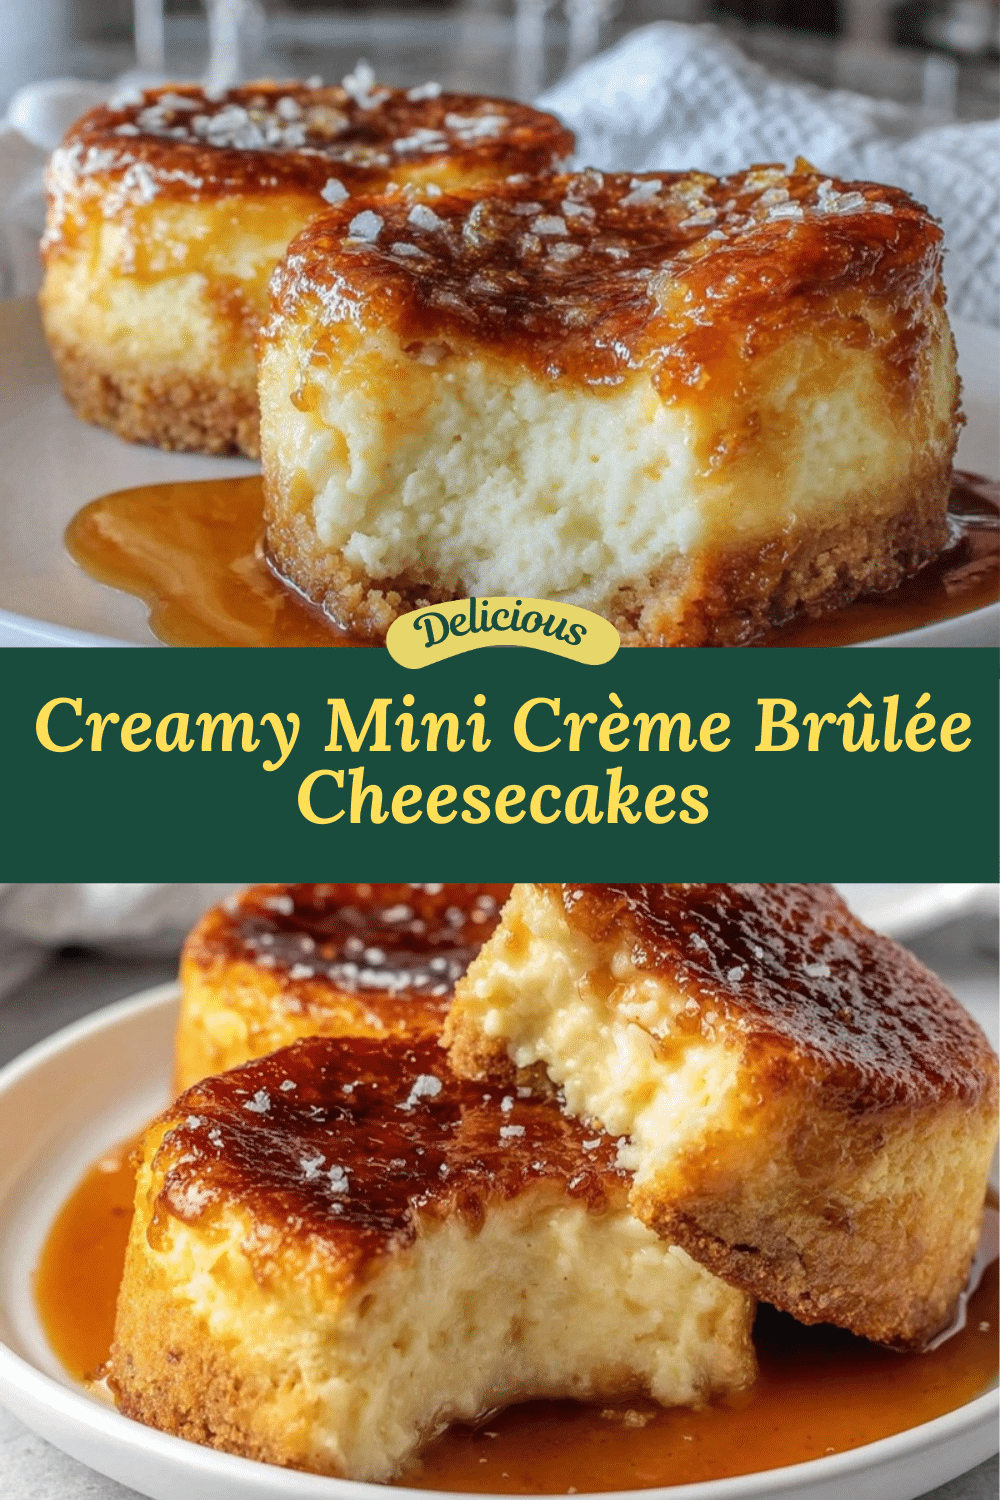
This recipe stands out because of its unique twist: instead of a traditional cheesecake crust, the creamy mini crème brûlée cheesecakes skip the crumbly base, letting the custard-like filling steal the show. The brûlée topping is made with just the right amount of caramelization, giving a subtle bitterness that perfectly balances the richness.
It’s the kind of dessert that makes you close your eyes after the first bite and smile. Honestly, it’s comfort food reimagined – indulgent yet simple, fancy yet homey. I’ve served these at dinner parties where guests couldn’t stop talking about them, and they’re just as perfect for quiet nights when you want to treat yourself without the fuss.
What Ingredients You Will Need
This recipe uses simple, wholesome ingredients to deliver bold flavor and a smooth, satisfying texture without the fuss. Most of these are pantry staples, and a few fresh elements make it shine.
- Cream Cheese (8 oz / 225 g, softened): The star of the cheesecake filling, providing rich creaminess. I prefer full-fat cream cheese for the best texture.
- Heavy Cream (1 cup / 240 ml): Adds luxurious smoothness to the custard. You can swap with half-and-half for a lighter option, but the texture will be less creamy.
- Granulated Sugar (3/4 cup / 150 g): Used both in the batter and on top for the brûlée crust. I recommend pure cane sugar for a clean caramel flavor.
- Eggs (3 large, room temperature): These bind the cheesecake and give it that custard-like consistency.
- Vanilla Extract (1 tsp): Adds warmth and depth to the flavor – pure vanilla extract is best.
- Salt (a pinch): Balances sweetness and enhances all the flavors.
Optional but highly recommended:
- Lemon Zest (from 1 lemon): Gives a fresh, bright note that cuts through the richness.
- Sugar for caramelizing (about 2 tbsp per cheesecake): Use superfine sugar if you have it – it melts faster and burns evenly.
If you want to make these dairy-free, you could try a vegan cream cheese and coconut cream, but I haven’t tested that variation thoroughly. For a gluten-free option, these are naturally safe since there’s no crust.
Equipment Needed
- Ramekins (4-6 small, 4 oz / 120 ml each): Perfect for individual servings. I use classic white ceramic ones because they hold heat well and look elegant.
- Mixing Bowls: A medium bowl for the batter and a small one for sugar topping.
- Electric Mixer: Handheld or stand mixer helps get that smooth cheesecake filling without lumps. You can do it by hand, but it takes longer.
- Kitchen Torch: Essential for caramelizing the sugar topping to get that signature brûlée crust. If you don’t have one, you can use your oven’s broiler, but watch closely to avoid burning.
- Baking Pan for Water Bath: A large roasting pan or baking dish to hold the ramekins in a hot water bath – this prevents cracking and gives a silky texture.
- Measuring Cups and Spoons: For precise ingredient amounts.
Pro tip: If you don’t have a kitchen torch, a small broiler pan rack placed close to the broiler element works well. Just keep an eye on the sugar because it browns quickly!
Preparation Method
- Preheat your oven to 325°F (160°C): This moderate temperature helps bake the custards gently, ensuring creamy texture without cracks. Set your oven rack in the middle position.
- Prepare the water bath: Place a folded kitchen towel at the bottom of a large baking pan. This keeps the ramekins stable. You’ll fill this with hot water later, so have a kettle or pot ready.
- Mix the cream cheese: In a medium bowl, beat 8 oz (225 g) softened cream cheese with an electric mixer on medium speed until smooth and creamy. This usually takes about 2-3 minutes. No lumps here!
- Add sugar and eggs: Gradually add 3/4 cup (150 g) granulated sugar, mixing well. Then add 3 large eggs one at a time, beating gently after each addition. Overmixing can add too much air, which causes cracks, so mix just until combined.
- Incorporate cream and vanilla: Pour in 1 cup (240 ml) heavy cream and 1 tsp vanilla extract. Add a pinch of salt and, if using, lemon zest. Blend everything together on low speed until silky and smooth.
- Strain the batter (optional but recommended): Pour the mixture through a fine-mesh sieve into another bowl to remove any lumps for an ultra-smooth finish. I do this every time for the best texture.
- Fill ramekins: Divide the batter evenly among 4-6 ramekins (about 4 oz / 120 ml each). Leave a little space at the top to prevent overflow.
- Add hot water: Carefully pour hot water into the baking pan around the ramekins, coming halfway up their sides. This water bath keeps the temperature steady and prevents cracking.
- Bake: Place the baking pan with ramekins in the oven. Bake for 35-40 minutes or until the edges are set but the center still jiggles slightly when you gently shake the pan. This slight wobble means perfectly creamy custard.
- Cool and chill: Remove ramekins from water bath and let cool to room temperature. Then refrigerate for at least 2 hours or overnight for best flavor and texture.
- Caramelize the sugar topping: When ready to serve, sprinkle about 2 tablespoons of granulated sugar evenly over each cheesecake’s surface. Use a kitchen torch to melt and caramelize the sugar until golden brown and crisp. If you don’t have a torch, place under the broiler for 1-2 minutes, watching like a hawk!
- Serve immediately: The brûlée topping is at its best right after caramelizing. The contrast between cold creamy cheesecake and warm crisp sugar is what makes these mini crème brûlée cheesecakes so irresistible.
If you notice any cracks, don’t sweat it—sometimes it happens! The water bath usually helps prevent it, and chilling the cheesecakes thoroughly will firm them up nicely.
Cooking Tips & Techniques
For creamy mini crème brûlée cheesecakes, timing and technique are everything. Here’s what I’ve learned after many batches:
- Don’t overbeat the batter: Too much air leads to cracks or a spongy texture. Mix just until smooth and combined.
- Use room temperature ingredients: Cream cheese and eggs that aren’t cold blend better and create a silkier filling.
- Water bath is key: The hot water gently cooks the cheesecakes, preventing overcooked edges and cracking. Make sure the water is hot but not boiling.
- Watch the baking time: Because these are mini cheesecakes, they bake faster than a full-size one. Start checking around 30 minutes to avoid overbaking.
- Chill well: Let the cheesecakes cool completely in the fridge before caramelizing. This helps the custard set firmly and keeps the brûlée topping crisp.
- Caramelize with care: A kitchen torch gives the best control for the perfect brûlée crust. Move the flame evenly and don’t hold it in one spot too long to avoid burning.
One mistake I made early on was trying to caramelize sugar on warm cheesecakes right out of the oven, which caused the custard to soften too much. Waiting till they’re chilled makes all the difference.
Variations & Adaptations
- Chocolate Twist: Add 2 tablespoons of cocoa powder to the batter for a rich chocolate crème brûlée cheesecake. You can also sprinkle mini chocolate chips on top before baking for extra texture.
- Berry Infusion: Mix fresh raspberries or blueberries into the batter or serve with a berry compote on the side for a fruity pop that balances the richness.
- Dairy-Free Version: Swap cream cheese with a vegan alternative and use coconut cream instead of heavy cream. The texture will differ slightly, but it’s a tasty alternative.
- Spiced Variation: Add a pinch of cinnamon or cardamom to the batter for a warm, cozy flavor perfect for fall or winter gatherings.
- Mini Tartlet Style: For a crunchy base, press a thin layer of crushed graham crackers mixed with melted butter into the bottom of each ramekin before filling. This adds a lovely contrast to the creamy filling.
Personally, I love the lemon zest variation for a bright twist that cuts through the richness. It’s a refreshing change, especially in spring and summer.
Serving & Storage Suggestions
Serve your creamy mini crème brûlée cheesecakes chilled, right after torching the sugar top. The contrast between the cold custard and warm caramelized sugar is absolute bliss. Present them in the ramekins or gently loosen with a knife and transfer to a small dessert plate for a fancy touch.
Pair these desserts with a cup of strong espresso or a glass of dessert wine to complement the sweetness and richness. A few fresh berries or a sprig of mint on the side adds a lovely pop of color and freshness.
To store, cover the cheesecakes with plastic wrap and keep refrigerated for up to 3 days. Avoid caramelizing the sugar until just before serving, as the crust will soften in the fridge. If you want to prep ahead, bake and chill the cheesecakes, then caramelize the sugar right before serving.
If you want to freeze them, skip the brûlée topping and freeze covered for up to a month. Thaw overnight in the fridge, then torch the sugar before serving.
Flavors actually deepen after chilling overnight, so making these a day ahead can really enhance the taste.
Nutritional Information & Benefits
Each mini crème brûlée cheesecake (about 4 oz / 120 g) contains roughly:
| Calories | Fat | Carbohydrates | Protein |
|---|---|---|---|
| 320 kcal | 25 g | 18 g | 5 g |
The rich cream cheese and heavy cream provide a good dose of calcium and vitamin A, while eggs add protein and essential nutrients. Although these mini cheesecakes are indulgent, their small size helps with portion control.
This recipe is naturally gluten-free since it skips the crust, making it suitable for those avoiding gluten. If you tweak it for dairy-free, it can fit vegan diets too. Just keep in mind the higher fat content due to cream and cheese.
From a wellness perspective, I enjoy these as an occasional treat that satisfies sweet cravings without overdoing the sugar. The balance of creamy texture and crisp brûlée topping makes it feel like a real celebration dessert rather than just a quick fix.
Conclusion
Creamy mini crème brûlée cheesecakes are the perfect blend of elegance and ease. They bring together the silky smoothness of cheesecake with the classic brûlée crunch in a perfectly portioned dessert that’s sure to impress. Whether you’re aiming for a special occasion or just want a little homemade delight, this recipe hits all the right notes.
Feel free to customize with your favorite flavors – a hint of citrus, a touch of spice, or a splash of chocolate. I love how forgiving and adaptable this recipe is, yet it always delivers that wow factor.
Give these creamy mini crème brûlée cheesecakes a try and let me know how you make them your own. Drop a comment, share your tweaks, or tell me about your brûlée success stories – I’d love to hear!
Happy baking and sweet enjoying!
FAQs
How long can I store these mini crème brûlée cheesecakes?
They keep well covered in the refrigerator for up to 3 days. Caramelize the sugar just before serving for the best crunch.
Can I make the cheesecakes ahead of time?
Yes! Bake and chill them in advance, then torch the sugar topping right before serving to keep it crisp.
What if I don’t have a kitchen torch?
You can use your oven’s broiler. Place the ramekins under the broiler for 1-2 minutes, watching closely so the sugar doesn’t burn.
Can I freeze these cheesecakes?
Yes, but skip caramelizing the sugar before freezing. Freeze covered for up to a month and thaw overnight in the fridge. Torch the sugar after thawing.
Is there a gluten-free option?
This recipe is naturally gluten-free since it has no crust. Just make sure your vanilla and other ingredients are gluten-free certified.
Pin This Recipe!

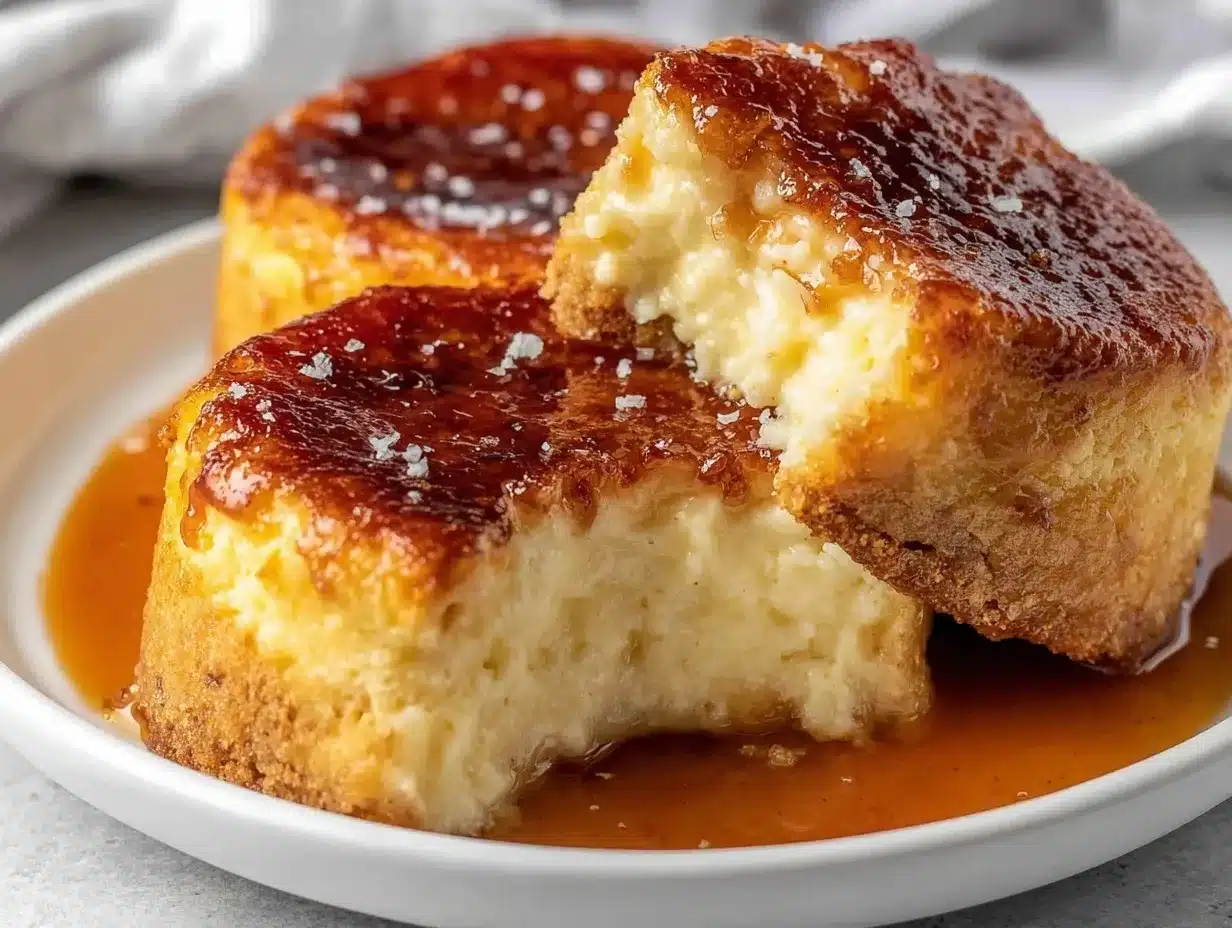
Creamy Mini Crème Brûlée Cheesecakes
- Total Time: 2 hours 55 minutes
- Yield: 4-6 servings 1x
Description
These creamy mini crème brûlée cheesecakes combine a silky smooth cheesecake filling with a crisp caramelized sugar topping, perfect for an elegant yet fuss-free dessert.
Ingredients
- 8 oz (225 g) cream cheese, softened
- 1 cup (240 ml) heavy cream
- 3/4 cup (150 g) granulated sugar
- 3 large eggs, room temperature
- 1 tsp vanilla extract
- Pinch of salt
- Lemon zest from 1 lemon (optional)
- About 2 tbsp granulated sugar per cheesecake for caramelizing (use superfine sugar if available)
Instructions
- Preheat your oven to 325°F (160°C). Set oven rack in the middle position.
- Place a folded kitchen towel at the bottom of a large baking pan to stabilize ramekins.
- In a medium bowl, beat softened cream cheese with an electric mixer on medium speed until smooth and creamy (2-3 minutes).
- Gradually add granulated sugar, mixing well. Add eggs one at a time, beating gently after each addition. Mix just until combined to avoid overmixing.
- Pour in heavy cream, vanilla extract, a pinch of salt, and lemon zest if using. Blend on low speed until silky and smooth.
- Optionally strain the batter through a fine-mesh sieve for an ultra-smooth finish.
- Divide batter evenly among 4-6 ramekins (4 oz / 120 ml each), leaving space at the top.
- Carefully pour hot water into the baking pan around the ramekins, filling halfway up their sides.
- Bake for 35-40 minutes until edges are set but centers jiggle slightly when shaken.
- Remove ramekins from water bath and cool to room temperature, then refrigerate for at least 2 hours or overnight.
- Before serving, sprinkle about 2 tablespoons of granulated sugar evenly over each cheesecake.
- Use a kitchen torch to caramelize the sugar until golden brown and crisp. Alternatively, place under broiler for 1-2 minutes, watching closely.
- Serve immediately for best contrast between cold creamy cheesecake and warm crisp sugar.
Notes
Do not overbeat the batter to avoid cracks. Use room temperature ingredients for best texture. Water bath prevents cracking and ensures creamy custard. Chill cheesecakes thoroughly before caramelizing sugar topping. If no kitchen torch, use broiler carefully. For dairy-free, try vegan cream cheese and coconut cream but texture will vary. Can freeze without brûlée topping for up to a month.
- Prep Time: 15 minutes
- Cook Time: 40 minutes
- Category: Dessert
- Cuisine: French-inspired
Nutrition
- Serving Size: 1 mini cheesecake (4
- Calories: 320
- Fat: 25
- Carbohydrates: 18
- Protein: 5
Keywords: mini cheesecake, crème brûlée, creamy dessert, caramelized sugar, easy dessert, gluten-free dessert