The very first time I made these creamy no-bake Oreo cheesecake bars, I was craving something sweet but honestly didn’t want to fire up the oven. The smell of crushed Oreos mixed with smooth cream cheese instantly took me back to childhood dessert parties. You know that feeling when a simple treat feels fancy? That’s exactly what these bars bring to your kitchen. I’ve whipped up this recipe more times than I can count, tweaking it just enough to get that perfect balance of creamy filling and crunchy Oreo crust. It’s my go-to when friends pop by unexpectedly or when I simply want a quick, homemade indulgence without the fuss.
What I really love about this recipe is how effortlessly it comes together. The no-bake factor means you avoid the heat and hassle of baking, yet the texture and flavor scream classic cheesecake vibes. These bars are creamy, rich, and perfectly sweet without being too heavy. Plus, the Oreo cookies add that nostalgic crunch and chocolatey goodness that’s hard to resist. Whether you’re a dessert novice or a seasoned baker, you’ll find this recipe approachable, satisfying, and downright delicious.
If you’ve been hunting for an easy homemade treat that feels special but demands minimal time, these creamy no-bake Oreo cheesecake bars are your answer. I’ve tested this recipe multiple times, adjusting the creaminess and Oreo ratio to suit just about every sweet tooth. Trust me, once you try these bars, they’ll become a staple in your dessert repertoire.
Why You’ll Love This Recipe
- Quick & Easy: Ready in under 30 minutes, perfect for last-minute cravings or surprise guests.
- Simple Ingredients: No fancy shopping trips—just Oreos, cream cheese, and a few pantry staples.
- Perfect for Any Occasion: Ideal for potlucks, casual family dinners, or cozy nights in.
- Crowd-Pleaser: Kids and adults alike always ask for seconds (or thirds!).
- Unbelievably Delicious: The creamy texture combined with crunchy Oreos creates a heavenly bite each time.
This isn’t just your average Oreo cheesecake bar. The secret lies in blending the cream cheese and whipped topping until ultra-smooth, creating a luscious filling that melts in your mouth. Plus, the crust gets just the right amount of Oreo chunks for texture, not just a crumbly base. Honestly, it’s the kind of dessert that makes you close your eyes after the first bite, savoring every bit.
What sets this recipe apart is the balance—it’s richer than most no-bake cheesecakes but not overwhelming. The classic Oreo flavor shines through without stealing the show, and the no-bake method means you can skip the oven and still impress everyone. I often bring these bars to gatherings because they’re fuss-free yet fancy enough to serve as a showstopper.
What Ingredients You Will Need
This recipe uses simple, wholesome ingredients to deliver bold flavor and satisfying texture without the fuss. Most are pantry staples, so you probably have them on hand already.
- Oreo Cookies (about 24 cookies): For the crust and a bit of mix-in crunch. I prefer Original Oreos, but Golden Oreos work well too.
- Unsalted butter (5 tablespoons, melted): Binds the Oreo crust together, adding richness. Use good-quality butter like Kerrygold if you can.
- Cream Cheese (16 ounces, softened): The star of the filling. Make sure it’s softened to room temperature for smooth blending.
- Powdered Sugar (3/4 cup): Adds gentle sweetness without graininess.
- Vanilla Extract (1 teaspoon): Enhances the creamy flavor—pure vanilla is always best.
- Heavy Whipping Cream (1 cup): Whipped to soft peaks to lighten the filling beautifully.
Optional but recommended for a little extra flair:
- Mini Oreo Pieces (1/2 cup): Folded into the filling for extra cookie crunch.
- Chocolate Chips or Shavings: Sprinkle on top just before serving for a chocolatey touch.
Substitution notes:
- For a lighter version, swap heavy cream with whipped topping, though texture may be slightly less rich.
- Use dairy-free cream cheese and coconut cream to make it vegan-friendly.
- If avoiding gluten, check for gluten-free Oreo alternatives.
Equipment Needed
- 8×8-inch Baking Pan: Ideal for shaping and chilling the bars. You can use a 9×9-inch pan, but bars will be a bit thinner.
- Mixing Bowls: One large for the filling, and one for whipping cream.
- Electric Mixer or Stand Mixer: Essential for whipping the cream and cream cheese until smooth. Hand mixers work too but can take longer.
- Food Processor or Plastic Bag and Rolling Pin: For crushing Oreos finely for the crust.
- Rubber Spatula: Great for folding ingredients gently without deflating the cream.
- Measuring Cups and Spoons: For precise ingredient amounts.
If you don’t have a food processor, just crush the Oreos in a zip-top bag using a rolling pin or heavy can. I’ve done it both ways, and while the food processor is faster, the manual method gives you a bit more texture control.
Preparation Method
- Prepare the crust: Start by crushing about 24 Oreo cookies into fine crumbs using a food processor or by placing them in a zip-top bag and smashing with a rolling pin. You want a mix of fine crumbs and some small chunks for texture. This should take about 5 minutes.
- Mix crumbs with melted butter: Pour 5 tablespoons of melted unsalted butter into the Oreo crumbs and stir until evenly coated. The mixture should feel like damp sand and hold together when pressed. This step takes about 2 minutes.
- Press crust into pan: Transfer the crumb mixture into an 8×8-inch baking pan. Use the back of a spoon or flat-bottomed glass to press firmly and evenly across the bottom. Aim for a compact crust with no loose crumbs. Chill the crust in the fridge while preparing the filling (about 10 minutes).
- Whip the heavy cream: In a chilled mixing bowl, whip 1 cup of heavy cream using an electric mixer until soft peaks form. This usually takes 3 to 5 minutes. Be careful not to overwhip or you’ll get butter!
- Beat cream cheese and sugar: In a separate bowl, beat 16 ounces of softened cream cheese with 3/4 cup powdered sugar and 1 teaspoon vanilla extract until smooth and creamy. This step should take around 3 minutes with an electric mixer.
- Fold whipped cream into cream cheese mixture: Gently fold the whipped cream into the cream cheese mixture using a rubber spatula. This keeps the filling light and airy. Take your time to avoid deflating the mixture, about 2 minutes.
- Add mini Oreo pieces (optional): If using, fold in 1/2 cup mini Oreo pieces for extra crunch and flavor. This adds a delightful surprise in every bite.
- Spread filling over crust: Pour the creamy filling over your chilled Oreo crust and spread evenly with a spatula. Smooth the top for a clean finish. This takes about 3 minutes.
- Refrigerate for at least 4 hours: Place the pan in the fridge to set. Overnight chilling is best for the bars to firm up nicely and for flavors to meld. Patience is key here!
- Slice and serve: Once fully set, use a sharp knife to cut into bars. For clean edges, dip the knife in hot water and wipe dry between cuts.
If your filling feels too soft, a bit more chilling time can work wonders. If the crust seems crumbly, pressing harder when setting it will help it hold better.
Cooking Tips & Techniques
Whipping the cream and cream cheese properly is the magic that makes these bars so creamy. Always use room temperature cream cheese; cold cream cheese can leave lumps and make mixing a pain. I’ve made the mistake of rushing this step—trust me, taking your time yields a silky smooth filling.
When crushing Oreos, don’t pulverize them into dust. Leaving tiny chunks adds a lovely texture contrast to the creamy filling. I like to pulse the food processor a few times and then stir in any bigger bits leftover.
Folding whipped cream into the cream cheese mixture gently is essential. You don’t want to lose all that air you whipped in—it’s what keeps the bars light. A rubber spatula and a slow, careful fold work best.
Don’t skip chilling! The no-bake cheesecake bars need at least 4 hours to firm up, or overnight if possible. I once tried to cut them after just an hour—big mistake. They were a gooey mess, but after proper chilling, they sliced perfectly.
For easier slicing, run your knife under hot water before each cut to get smooth, clean edges without tearing the bars. It’s a little trick I picked up from my pastry chef friend.
Variations & Adaptations
- Chocolate Lovers’ Twist: Add 1/4 cup cocoa powder to the cream cheese mixture for a chocolate-flavored filling. You can also swirl melted chocolate on top before chilling for a marbled effect.
- Berry Delight: Fold in 1/2 cup fresh raspberries or strawberries into the filling for a fruity surprise. This adds freshness and a pop of color. Swap some Oreos for vanilla wafers for a lighter crust.
- Peanut Butter Oreo Bars: Mix 1/3 cup creamy peanut butter into the cream cheese filling before folding in whipped cream. The nutty flavor pairs amazingly with Oreos.
- Gluten-Free Option: Use gluten-free Oreo-style cookies or substitute with gluten-free chocolate sandwich cookies for the crust.
- Vegan Version: Replace cream cheese with a plant-based alternative and use coconut cream whipped to peaks instead of heavy cream. Use dairy-free Oreos or similar cookies.
I personally love adding mini chocolate chips on top before chilling—it adds a little crunch and extra chocolate boost without overpowering the Oreo flavor.
Serving & Storage Suggestions
These creamy no-bake Oreo cheesecake bars are best served chilled, straight from the fridge. The texture is firm yet soft, and each bite melts in your mouth. You can plate them simply or dust with a little powdered sugar or cocoa powder for a pretty finish.
Pair these bars with a hot cup of coffee or a cold glass of milk for a classic combo. They also make a fantastic dessert after a casual dinner or as a sweet snack for afternoon cravings.
Store leftover bars covered tightly in the refrigerator for up to 4 days. For longer storage, wrap bars individually and freeze for up to 3 months. Thaw in the fridge overnight before serving.
Reheating isn’t necessary, but if you prefer a slightly softer texture, leave bars at room temperature for 10 to 15 minutes before enjoying. The flavors tend to deepen after a day or two, so if you can wait, you’re in for an even tastier treat.
Nutritional Information & Benefits
Each bar is roughly 250-300 calories, depending on size, with a good balance of fats and sugars. The cream cheese provides a rich source of protein and calcium, while the Oreos add a nostalgic chocolate note.
This recipe isn’t exactly a health food, but it shines as a treat you can make at home with control over ingredients. Using quality butter and cream cheese without fillers makes a difference in flavor and texture. For those watching gluten or dairy, the recipe is adaptable.
From my experience, enjoying a homemade dessert like this in moderation can satisfy your sweet tooth without feeling guilty. It’s perfect for celebrations or simply as a little ‘me-time’ indulgence.
Conclusion
If you’re after a creamy, dreamy, no-bake dessert that comes together quickly and tastes like a bakery treat, these Oreo cheesecake bars are your new best friend. They’re easy to customize, crowd-pleasing, and just downright comforting. I love making these bars when I want a fuss-free dessert that wows without hours in the kitchen.
Give this recipe a try, tweak it to your liking, and don’t hesitate to share your adaptations in the comments. I’m always excited to hear how you make these bars your own! Remember, sometimes the simplest recipes bring the biggest smiles.
Happy baking (or no-baking!), and may your kitchen be filled with sweet, creamy joy.
FAQs
Can I make these Oreo cheesecake bars ahead of time?
Absolutely! They actually taste better after chilling overnight. Just keep them covered tightly in the fridge.
What if I don’t have heavy cream? Can I use whipped topping?
You can substitute whipped topping, but the texture might be less rich and creamy. Heavy cream whipped fresh gives the best results.
Can I use other cookies instead of Oreos?
Yes! Chocolate wafer cookies or vanilla sandwich cookies work well too. Just adjust sweetness if needed.
How do I get clean slices when cutting the bars?
Dip your knife in hot water and wipe it dry before each cut. This helps make smooth, neat edges without crumbling.
Is this recipe gluten-free?
Traditional Oreos contain gluten, so to make it gluten-free, use certified gluten-free sandwich cookies instead.
Pin This Recipe!
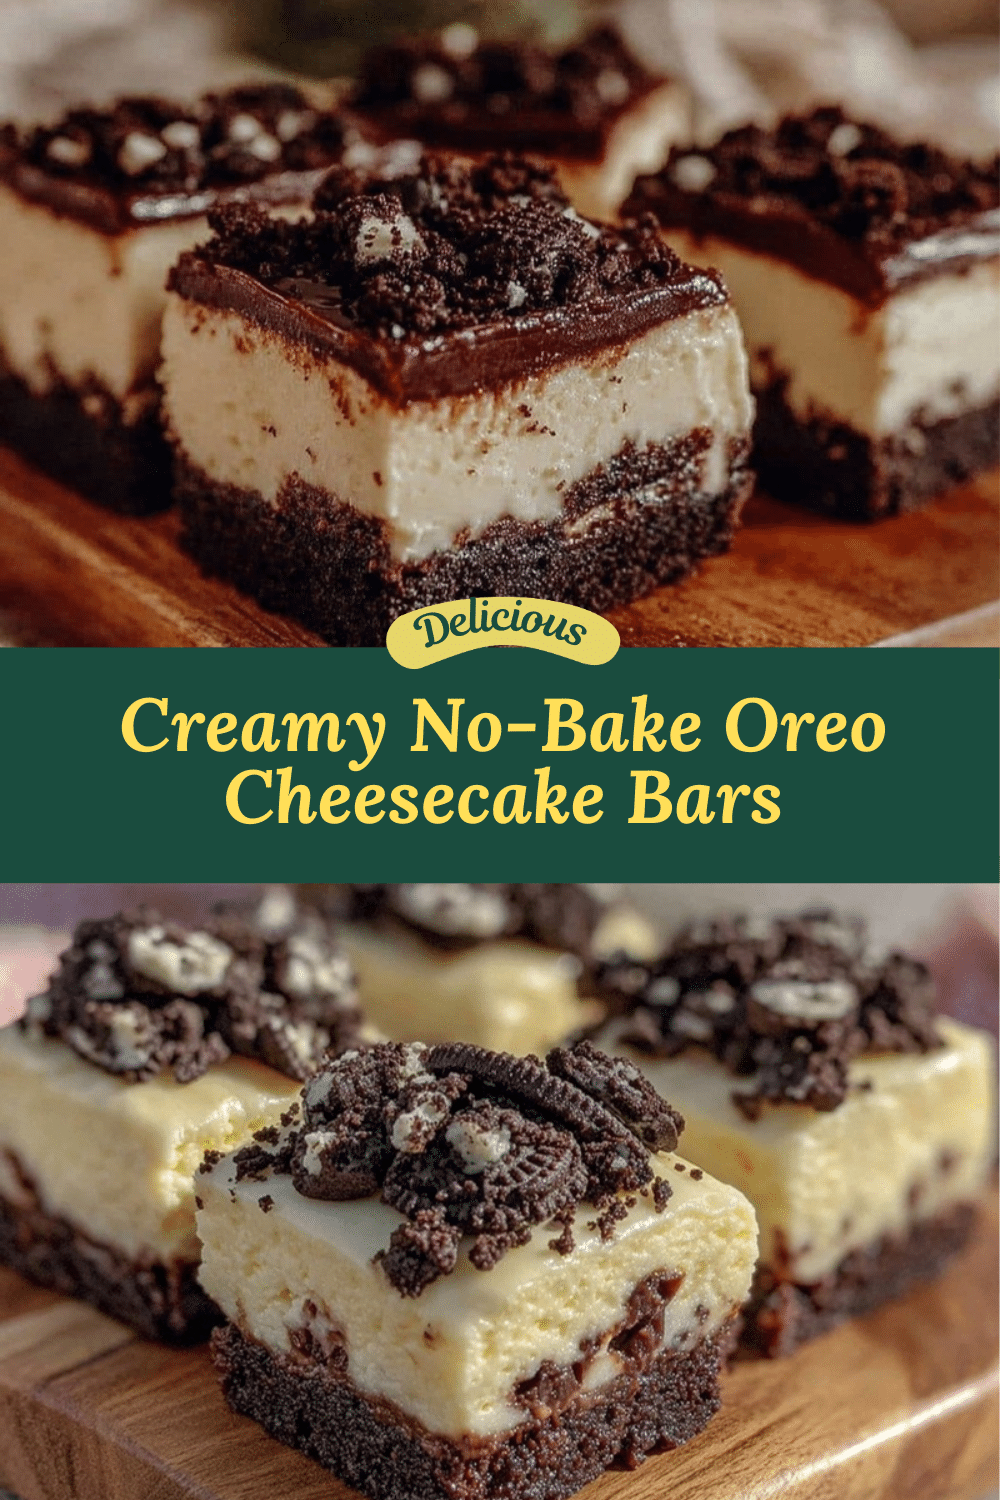

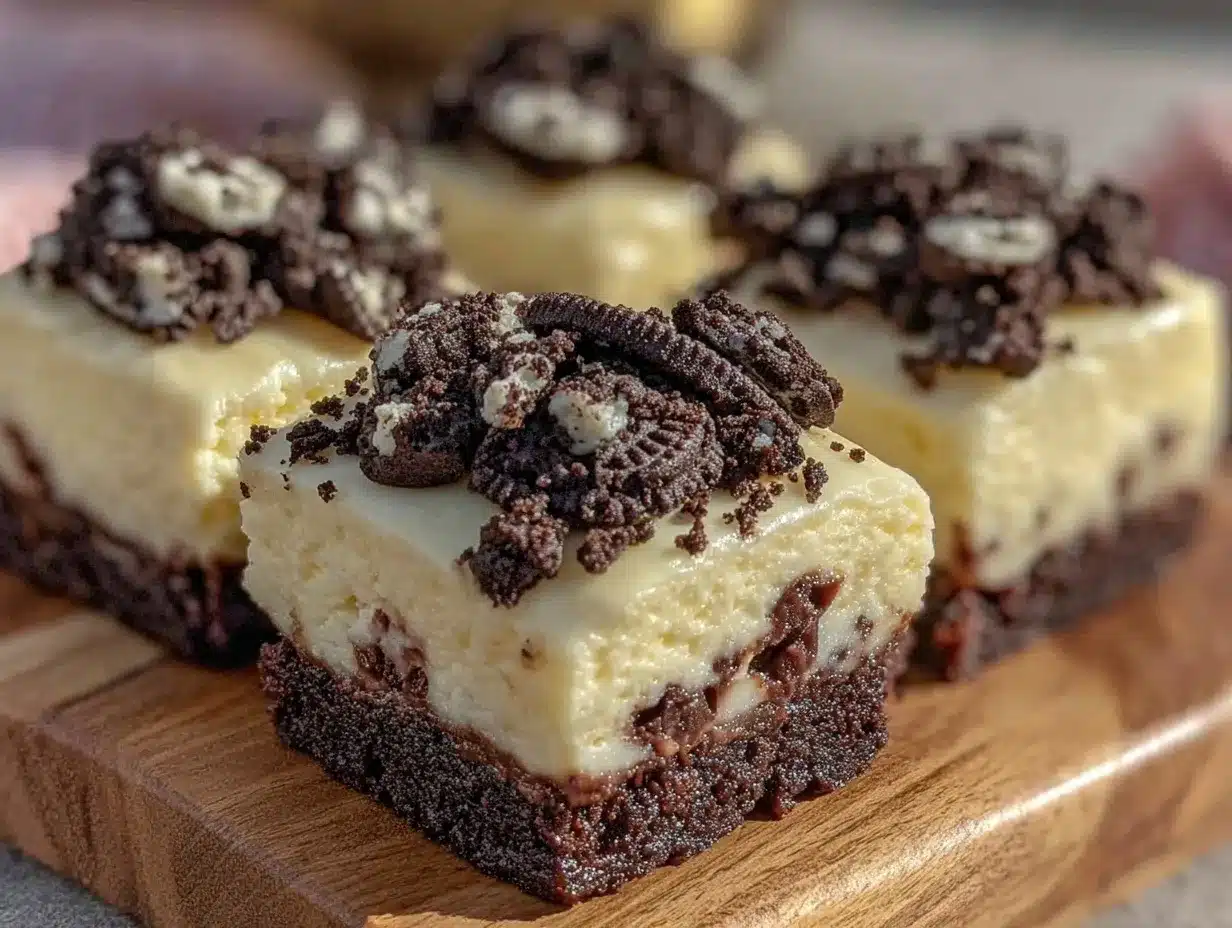
Creamy No-Bake Oreo Cheesecake Bars
- Total Time: 4 hours 15 minutes
- Yield: 16 servings 1x
Description
These creamy no-bake Oreo cheesecake bars combine a crunchy Oreo crust with a smooth, rich cream cheese filling, perfect for a quick and indulgent dessert without baking.
Ingredients
- 24 Oreo Cookies (Original or Golden)
- 5 tablespoons unsalted butter, melted
- 16 ounces cream cheese, softened
- 3/4 cup powdered sugar
- 1 teaspoon vanilla extract
- 1 cup heavy whipping cream
- Optional: 1/2 cup mini Oreo pieces
- Optional: chocolate chips or shavings for topping
Instructions
- Crush about 24 Oreo cookies into fine crumbs with some small chunks using a food processor or by smashing in a zip-top bag with a rolling pin (about 5 minutes).
- Mix the Oreo crumbs with 5 tablespoons melted unsalted butter until evenly coated and the mixture feels like damp sand (about 2 minutes).
- Press the crumb mixture firmly and evenly into the bottom of an 8×8-inch baking pan. Chill in the refrigerator for about 10 minutes.
- Whip 1 cup heavy cream in a chilled bowl with an electric mixer until soft peaks form (3-5 minutes).
- Beat 16 ounces softened cream cheese with 3/4 cup powdered sugar and 1 teaspoon vanilla extract until smooth and creamy (about 3 minutes).
- Gently fold the whipped cream into the cream cheese mixture using a rubber spatula to keep it light and airy (about 2 minutes).
- If desired, fold in 1/2 cup mini Oreo pieces for extra crunch.
- Spread the creamy filling evenly over the chilled Oreo crust and smooth the top (about 3 minutes).
- Refrigerate the bars for at least 4 hours or overnight to set.
- Slice into bars using a sharp knife dipped in hot water and wiped dry between cuts for clean edges.
Notes
Use room temperature cream cheese for smooth mixing. Do not overwhip the cream to avoid turning it into butter. Chill bars at least 4 hours or overnight for best texture. For clean slices, dip knife in hot water and wipe dry between cuts. Optional add-ins include mini Oreo pieces and chocolate chips on top.
- Prep Time: 15 minutes
- Cook Time: 0 minutes
- Category: Dessert
- Cuisine: American
Nutrition
- Serving Size: 1 bar (assuming 16 b
- Calories: 275
- Sugar: 18
- Sodium: 180
- Fat: 18
- Saturated Fat: 10
- Carbohydrates: 25
- Fiber: 1
- Protein: 4
Keywords: no-bake, Oreo, cheesecake bars, easy dessert, creamy, quick dessert, homemade, Oreo crust